A “transformation” day bodice for a Victorian dress
A “transformation” day bodice for a Victorian dress
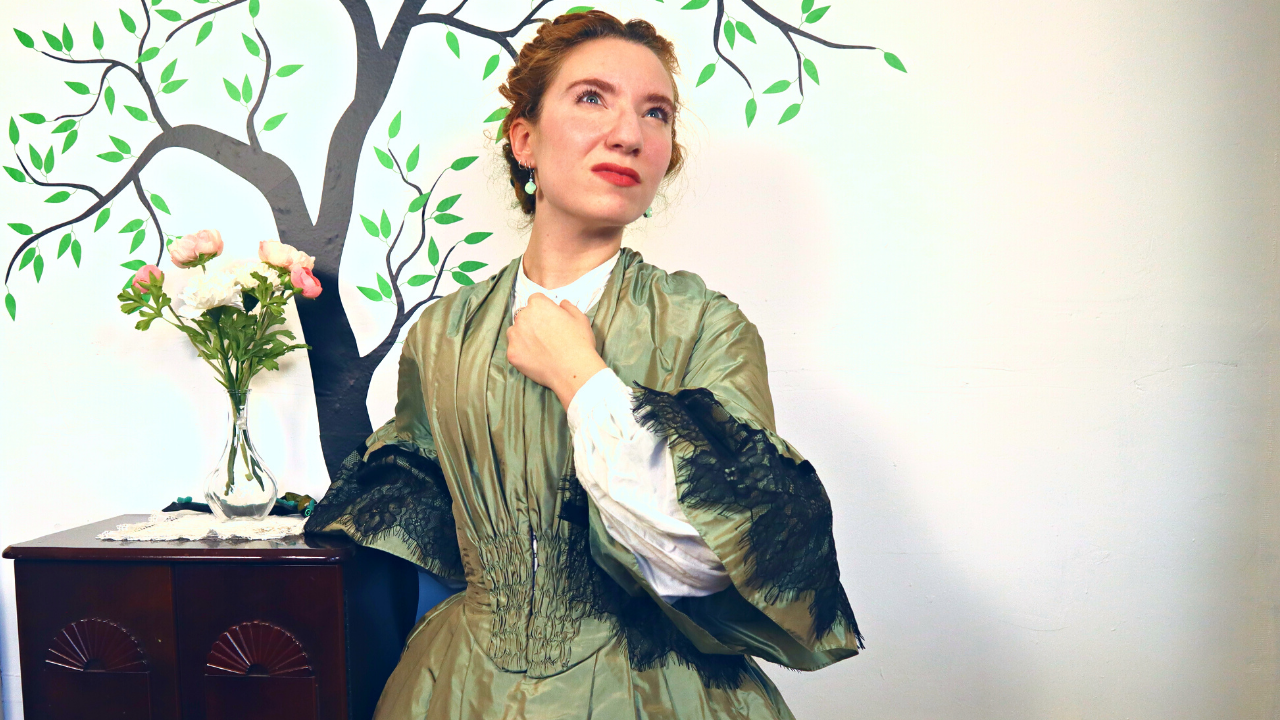
I'm transforming a Victorian dress from a ball gown to a day dress by sewing a second Victorian dress bodice. Watch me make a Victorian dress bodice to finish off the outfit I’ve designed for Mirah Lapidoth, the heroine of the Victorian novel Daniel Deronda by George Eliot.
What’s a “transformation” dress?
There's an ingenious trick for how to make a Victorian dress wearable as a day dress and ball gown : sew two bodices! Victorian dress styles were completely different for daytime and evening events, so many Victorian dresses had two tops to wear with the same skirt. Victorian dressmaking is full of clever techniques like this, and in Victorian costume making there is so much to learn from historical Victorian dressmaking techniques. A Victorian day dress with long sleeves and a higher neckline would get much more use than a ball gown, so it's much more useful for me to have a Victorian costume that works for both daytime and evening events. This dress will work for all my mid Victorian era events no matter how casual or formal they are.
The process
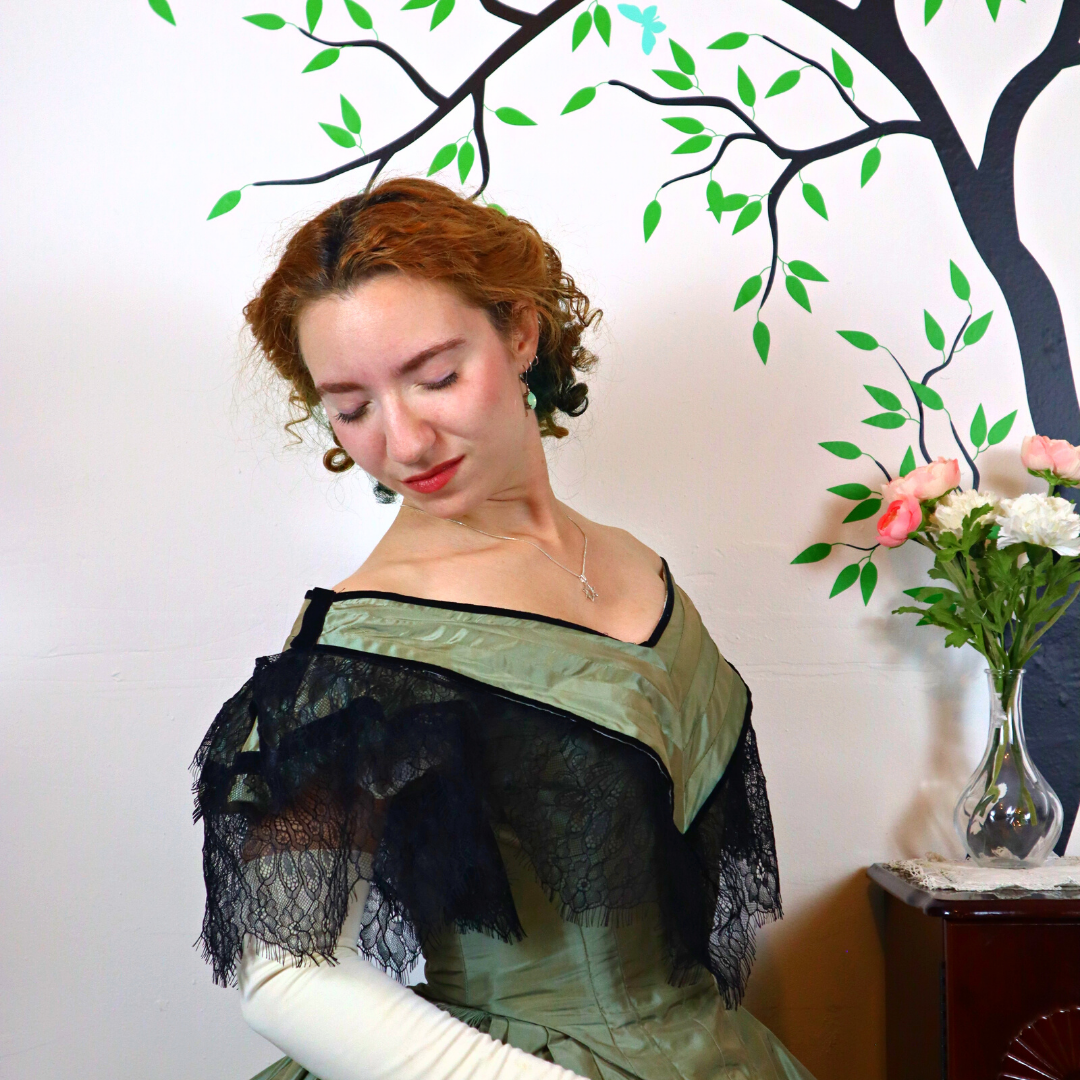
Learning how to sew a Victorian dress bodice is a process, but it's not too hard to make a DIY Victorian dress! There are so many good Victorian dress patterns thanks to Truly Victorian Patterns and other companies that make sewing patterns for Victorian era costumes. This Victorian bodice pattern makes a beautiful fan-front bodice suitable for the 1850s and early 1860s. With such good patterns available, anyone can learn how to make a simple Victorian dress for themself! I used the same silk taffeta and black lace trim for this as I did for the evening bodice and skirt, so everything matches. This style of bodice would not be historically accurate for 1865 when Daniel Deronda is set, having gone out of fashion 3 to 5 years earlier, but I happen to like it a lot and I’ll get more use out of a slightly earlier style. For a full listing of my resources and materials, check out my Patreon.
-
This video is kindly sponsored by Squarespace.
We don’t normally think of the Victorians as practical people, but when it came to dressmaking, they could be surprisingly pragmatic. In December I made a two-piece mid-Victorian evening gown, but since the bodice is low-necked and short-sleeved, a Victorian wearer would only be able to use it for special occasions. But if you’ve already got a skirt made up . . . why not just make two bodices to wear with it? Dresses like this were called “transformation gowns”, and I’m going to finish mine off with a daytime bodice.
While Daniel Deronda, the story that inspired this project, is set in 1865, I’m going for a style of bodice that would probably have been 3-5 years out of fashion by that point. There’s no explanation, other than “I love fan-front 1850s bodices” and “I’ve used this pattern before and I know it”. The light green shot silk taffeta will be gathered to a firm cotton twill interlining. The sleeves are wide, gathered “pagoda” sleeves, characteristic of the 1850s and inspired in large part by Western Orientalism in the mid-19th century. Beautiful as they are, they’re one of the many parts of Western fashion history with a decidedly ugly past.
The "fan front” is created with evenly spaced rows of gathering stitches, used to pull the bottom of the large front panels into shape while leaving the top fluffy. I’ll be honest : I was downright exhausted while making this, so I did as much of the prep work as I could by hand, in bed. It’s slower, but if I’m not feeling great, it’s more likely that I’ll actually do it at all.
While Past V is over there handstitching, I gotta show you guys something. My website is finished, and OH MY GOODNESS I still can’t believe how pretty it is. The entire site is built using Squarespace, who have kindly sponsored this video series as well. I think the most exciting thing here is the blog— apparently I have a blog now—where you can read about each of my videos, see some photos of the references or the outfit and how it was made, and watch the video right on the website. Also, for folks who need them, there are transcripts at the bottom of each post. The site is LIVE as of right now, so you can go check it out at SnappyDragonStudios.com! And once you’re done there, you can visit Squarespace.com/SnappyDragon for a free trial, and use code “SnappyDragon” to save 10% off your first website or domain purchase.
Okay, I think Past V is done with those gathering stitches now, so let’s go put this bodice together.
So, I did this for the center back lacing closure on the evening bodice of this gown, and now I’m going to do basically the same thing for the center front hook-and-eye closure on the daytime bodice. So here is my fashion fabric front piece. It's going to have all this gathering here, so it's not actually going to be this big. And then here's my interlining piece that I just sewed that internal channel into. Match them up at the neckline, stick a pin in here . . . it's right side out/right side down on the table, and then the interlining is on top of it. And then I can just place that here, fold this over the fashion fabric.
Now, if I stitch this down now, you'd have a line of, like, visible outside stitching on the outside center front of the bodice, and I’m trying to avoid that. That's the whole point of doing like this covered in internal boning channel. So instead I’m just gonna reach between the interlining and the fashion fabric and get some pins in that go just through the interlining and the folded around layer. I’m not going to catch what's underneath at all. Open it out . . . and I can just stitch here down this line and that will be completely invisible because it's not catching any of the outside layer. Then when it's folded back up I’ll have : boning channel on the inside, facing on the inside. Didn't have to cut anything separately, didn't have to apply anything to create a boning channel, and nothing showing on the outside .
The back piece, once gathered, can be flatlined normally.
Before I create the fan front, I’m going to baste the single front dart in the silk with a ladder stitch, then pull it tight to hold the dart in place while I sew it.
Now I can fold the front interlining to the wrong side of the silk, line everything up, and pin it in place. The gathering threads are pulled tight until the edges of the silk panel line up with the fitted interlining.
Then, the gathers are arranged evenly, and the threads are pulled through to the wrong side using a hand needle and secured in place there.
The front panel is also gathered at the shoulder seams, but only with one row of stitching.
After all that prep work, the bodice gets assembled. This stage is always extremely quick compared to the prep and finishing : pin all 5 pieces together at the sides and shoulders, and run them through the machine.
19th century bodices are lightly boned to sit smoothly, even when worn over a corset. I’m sewing some half-inch cotton twill tape to the side and side back seam allowances to form channels.
Now for those sleeves. There’s a semi-fitted upper sleeve, and a gathered lower sleeve that’s really just a big rectangle. I should have added trim first— it would have been easier— but I got ahead of myself and sewed the two pieces together first.
The bottom edge of the sleeve is hemmed with a rolled hem foot . . . and then a wide lace trim and a black velvet ribbon is added, to match the skirt. I also did this part from bed, because, this is what you do when you have a chronic illness. You make things work, even if that doesn’t look the way it would for other people.
Both edges of the velvet ribbon are sewn down, holding the lace trim in place and covering the raw edge.
What I love about mid-19th century sleeves is that they’re also gathered, so setting them in isn’t too precise. I match the seam to the notch on the pattern, pin it, then turn the whole thing inside out and gather the rest of the sleeve to fit.
Sewing them in on the machine is a bit annoying, only because my arms are so small that there’s hardly any room to maneuver the armhole around the machine.
The neckline is finished by hand, turning the edges of the silk and interlining in towards eachother and whip-stitching in place.
The boning is synthetic whalebone, cut to length and with the corners sanded smooth. The center front closure gets heavier bones, but everywhere else I use lighter and much more flexible ones.
I’m cutting strips from a scrap of silk to make self-fabric tape to finish the bottom edge. One edge is pressed under, and the other is sewn right sides together to the bodice. This also closes the boning channels. The folded edge is whipped down to the interlining, careful not to catch the outside layer.
Finally, I’m adding hook-and-eye tape to the center front. It’s kind of bulky, but so much faster than sewing fourteen hooks and eyes down one by one.
By the way: In the reveal footage, I have some marks on my neck from a medical treatment. I am not hurt, and no damage was done. Advice and comments are not needed.
It feels like a rough time to close out a project that’s about Jewish happiness, in the face of a world that only seems interested in Jewish tragedy. My fibromyalgia has been flaring out of control since what happened in Texas on the 15th. I’m exhausted, I’m angry, and I’m grieving, and Jews the world over are feeling the same.
But even so . . . We are still here. We have the resilience to remain who we are in this world. We have the strength to find joy. In beautiful clothes made simply for the delight of wearing them. In community, in friends, in the people who support us and love us. In singing opera, or our people’s blessings, or sea shanties, and in every other thing that can make a person happy to be alive.
We are still here. We are still who we are, and we are still proud rather than ashamed.
And nothing will take that away from me.


